

Enabling CloudFlare + Railgun on your website is a very easy feat on our Plesk powered WordPress optimized servers. To do this, first log into your Plesk panel and go to your subscriptions main page. On there you will see “Servershield by CloudFlare”. Click that
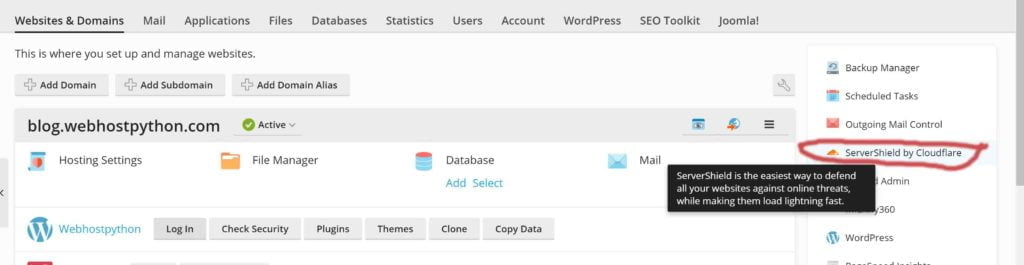
When you click that, it may need you to create a new account or sign in to an existing CLoudFlare account. Do that, and then return to this screen.
Now click on the ON button to turn it on for your domain. After that, you will see the option “manage cloudflare” become available
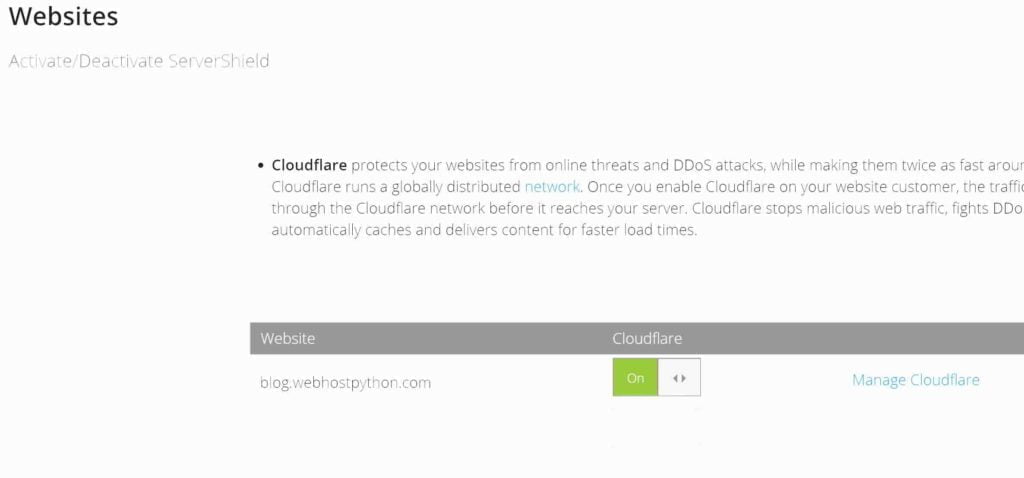
You have now enabled CloudFlare!
Enabling Railgun
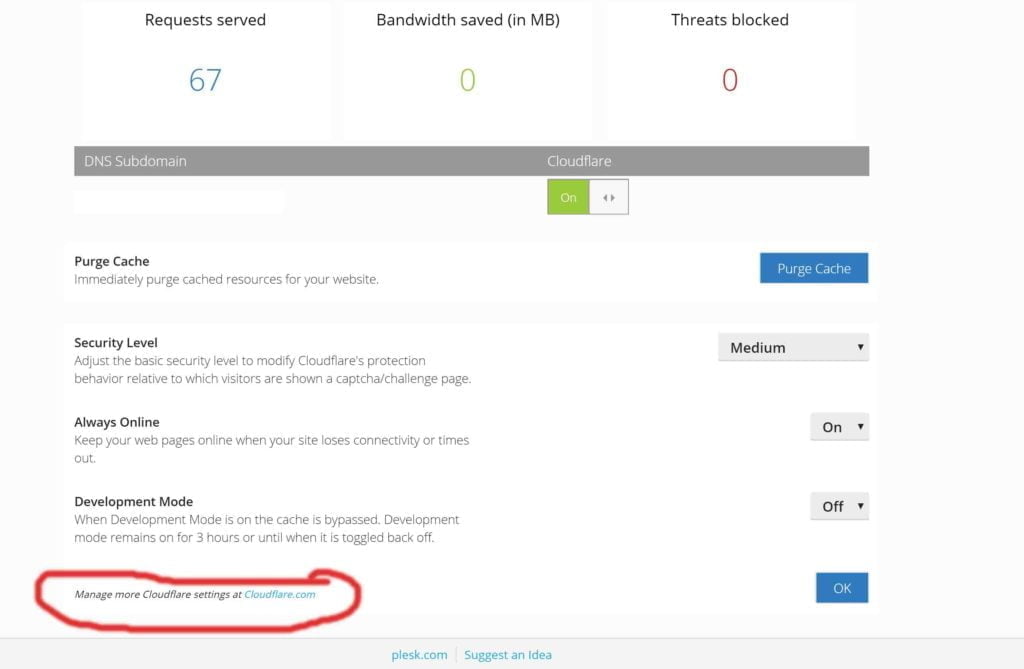
Now to enable Railgun, click on “Manage more cloudflare settings at CloudFlare.com”
This will take you to CloudFlares website. Log into your CloudFlare account using the same credentials you used in your Plesk panels CloudFlare. Then select your domain and go to “Speed >> Optimization”
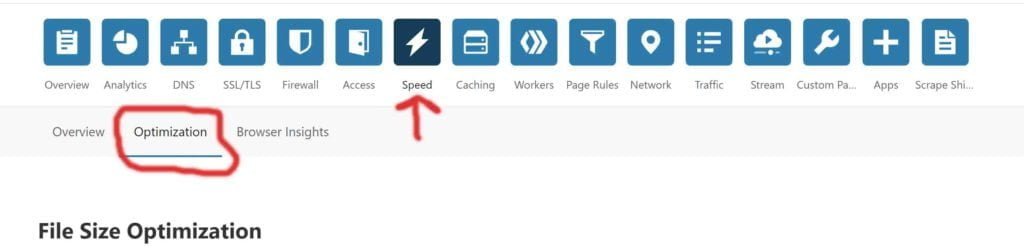
Now scroll down until you reach the subheading “Railgun”. Click “On” to turn it on

That’s it! You don’t have to change any of the ‘Railgun Settings’, they are already set for you. Just turn it on, Railgun State will say “Active” and you’re good to go!


")


