

There are times you need to access your file manager to either delete some files, or upload some files. This tutorial will show you how to access your File manager and how to remove or upload files
- Log into your DirectAdmin Panel
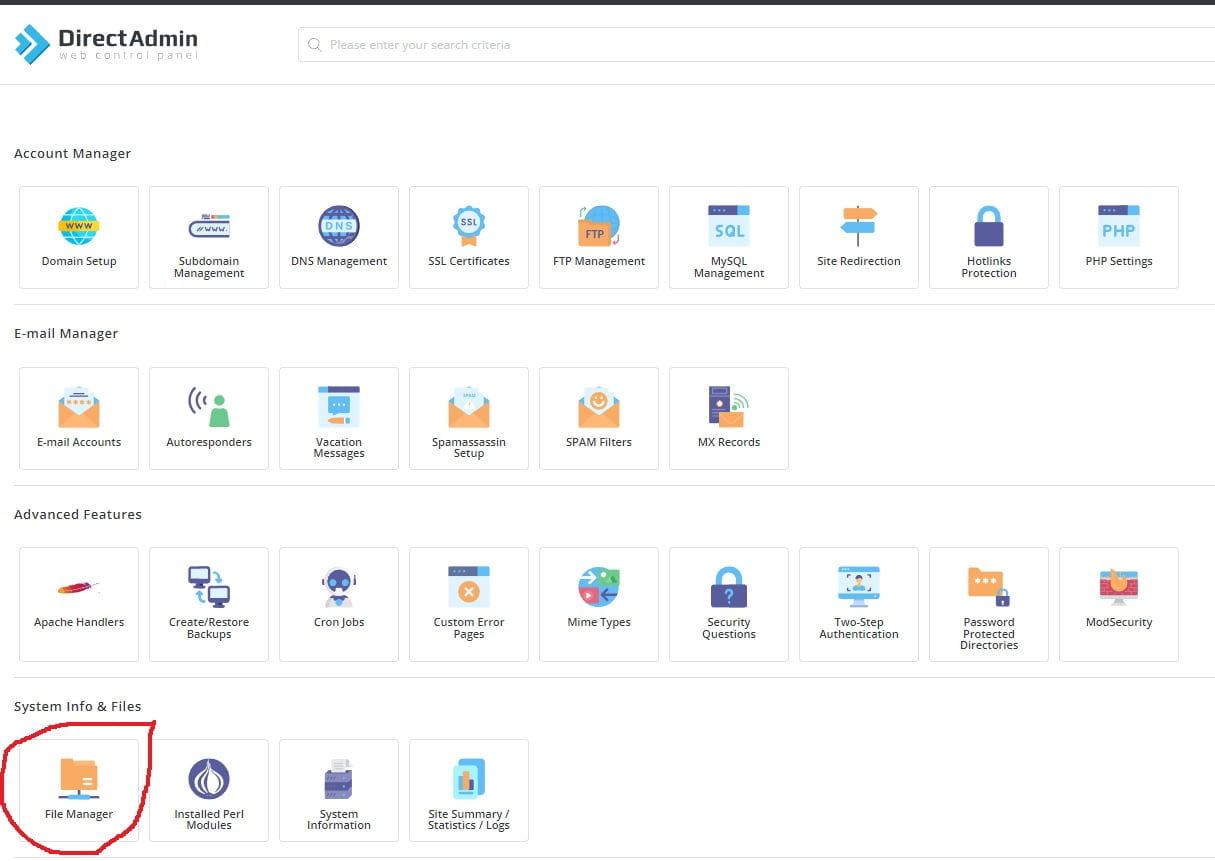
The first thing you want to do is log into DirectAdmin and click on File manager
2. Select files you want to delete
Now you are in the file manager and can select the files you want to delete. In this example, I click on “public_html” which is where all of your website files are stored for a website. I will put a check mark in the box to select-all files and folders and then will click ok to remove them all
NOTE! Deleting all files as found in this tutorial should only be done if you want to delete the website that is currently residing in this location
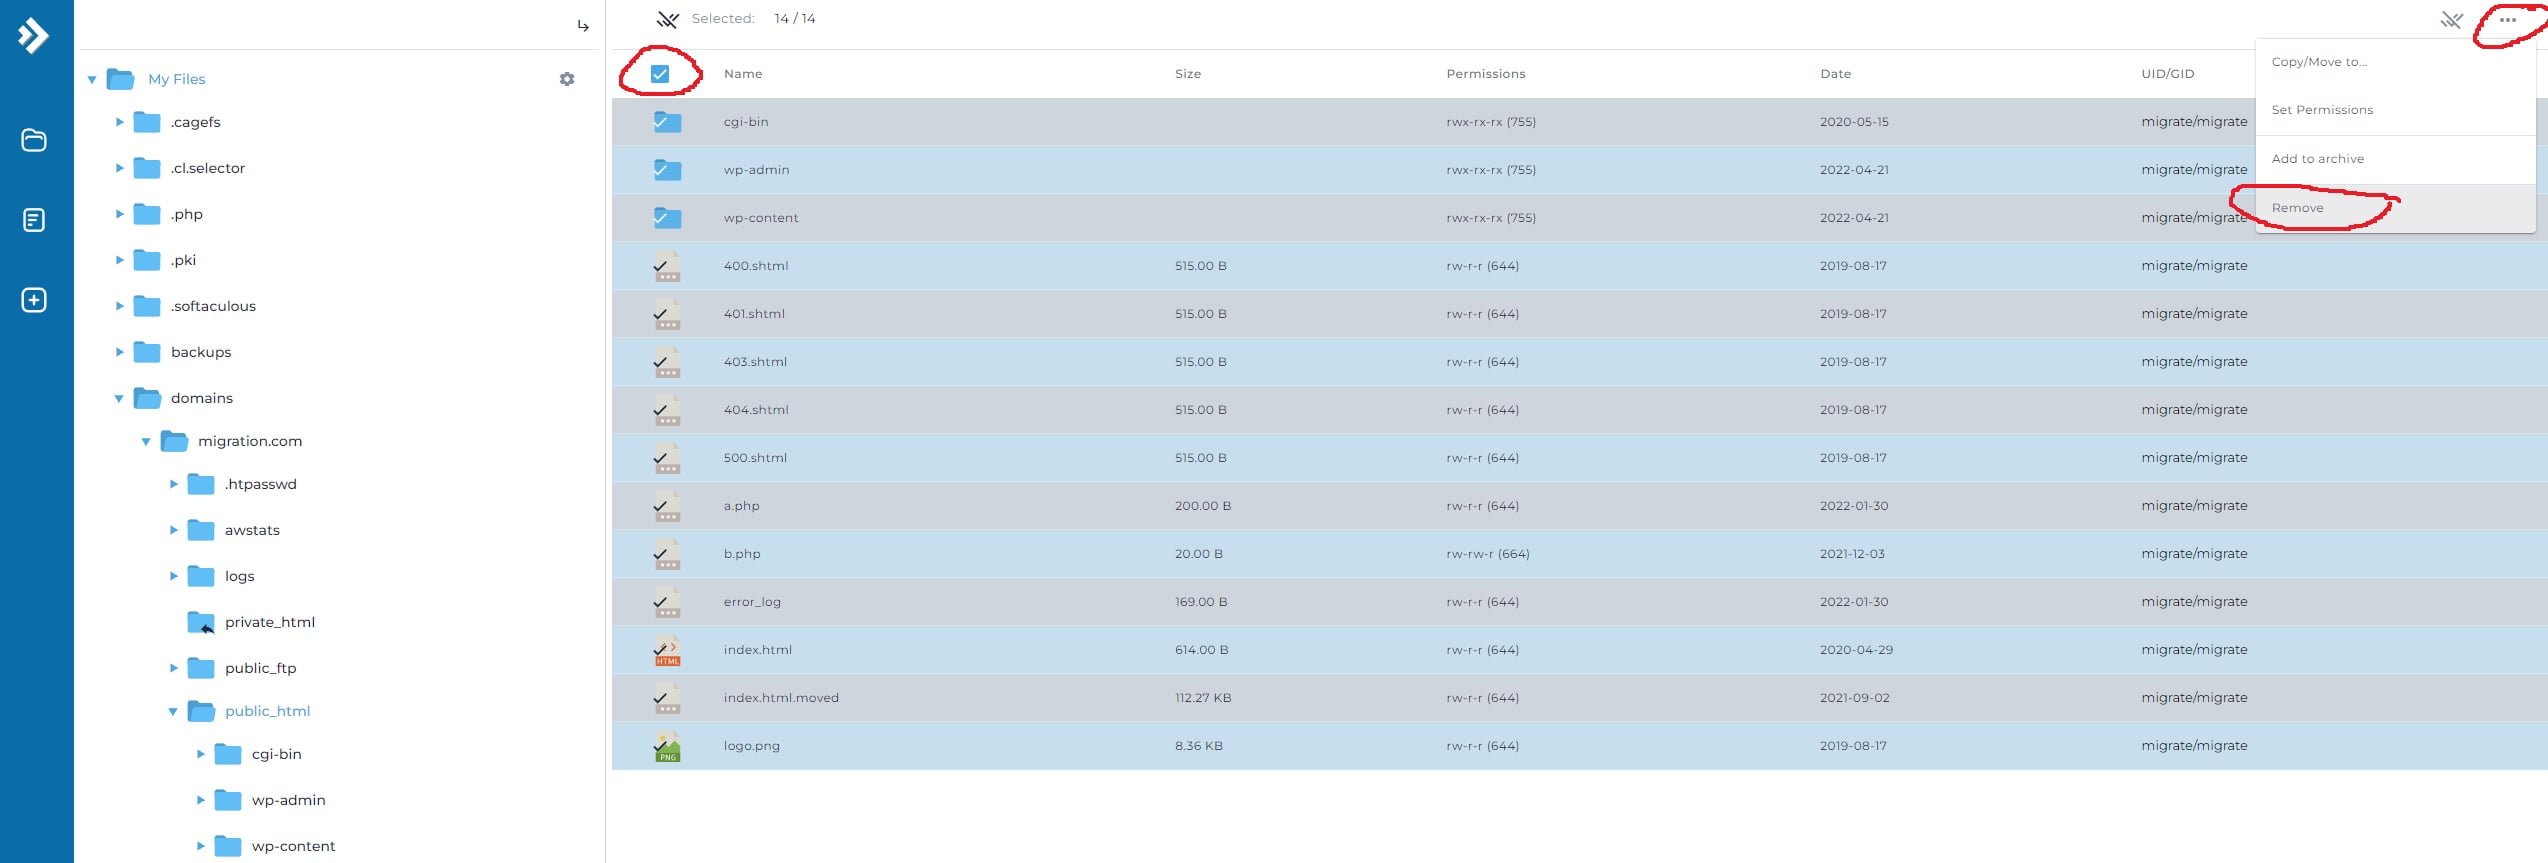
Once you select the file or the files you want to delete, they will go into the trash and be gone. You can then install a new website or upload files
3. Uploading files or creating folders via File manager
If you want to upload files from your computer via the DirectAdmin file manager, simply right click in an empty area and then click on “upload files” or click on “Create folder” or “Create File” if you need to do that
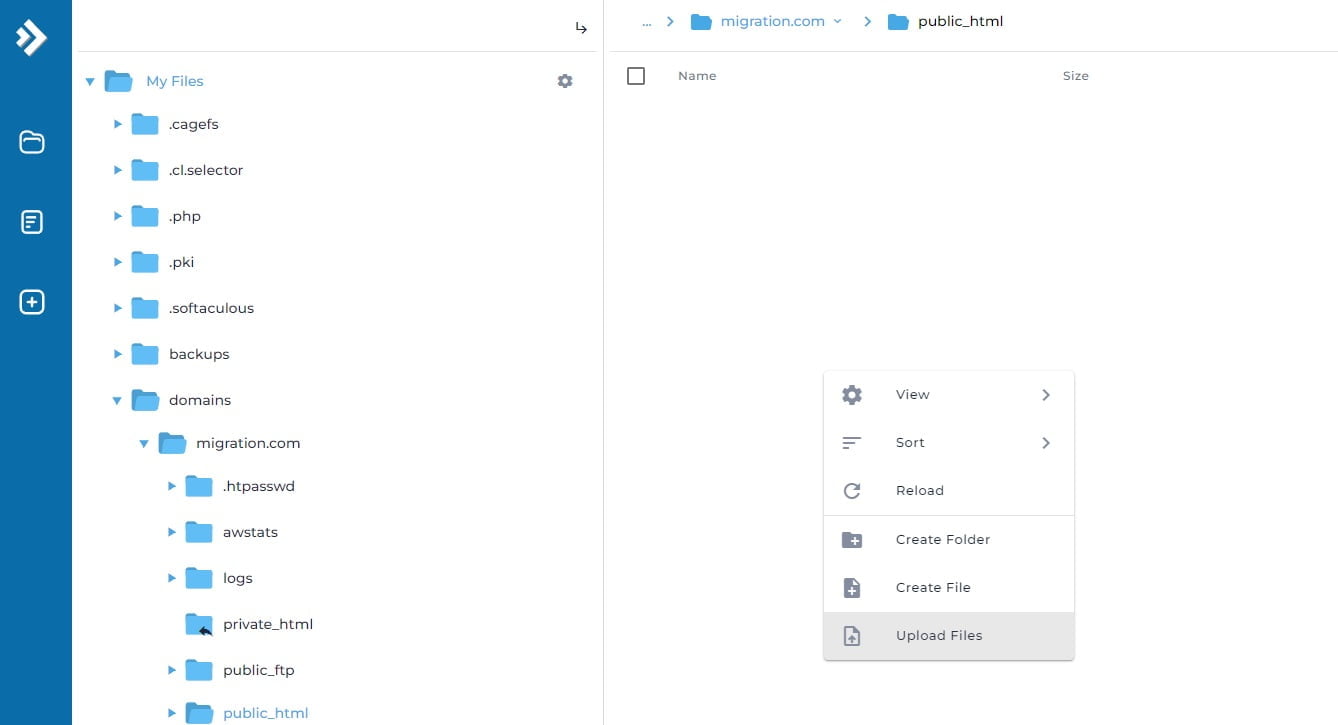
Note: What is public_html?! That is where your websites files all reside. This is why you go into this folder to delete files or upload files pertaining to your website. ALL other folders should be ignored (ex: logs, awstats, public_ftp, etc should always be left alone. )
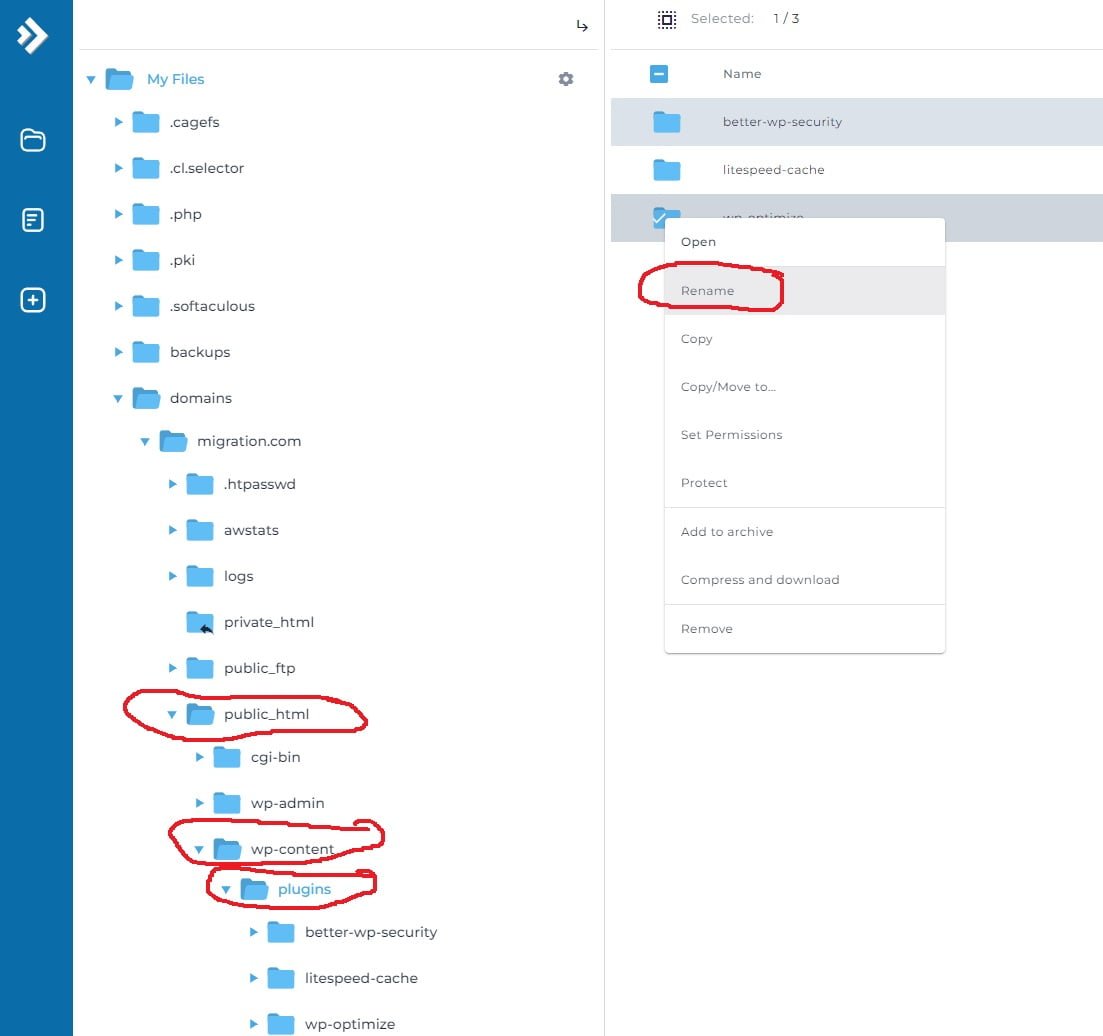
4. Renaming a folder via DirectAdmin File manager
To rename a folder or a file, you would simply right click on the file or folder you want to rename. This comes in handy when you have a faulty WordPress plugin that does not work when enabled and you need to disable it due to not being able to access the backend
That’s it!


")


