

So you have a new website you want to design for a client but the client doesn’t want his or her website going down while you work on a new design. What do you do?! This is where you would create what is called a “staging” area to create a new website that does not interfere with your clients new website. Follow this tutorial, and the control panel that applies to you, and you will see how easy it is to do this
- Login to your account here
The first thing you want to do is log into the end user control panel of the domain you want to create a staging site for as long as the domain is pointing to our server
Note! If your customers domain is currently pointing to another web hosting company while you work on their site, please do these steps using a domain you own yourself that is pointed to our server. You will be able to very easily transfer the staging area to their domain when you’re ready to!
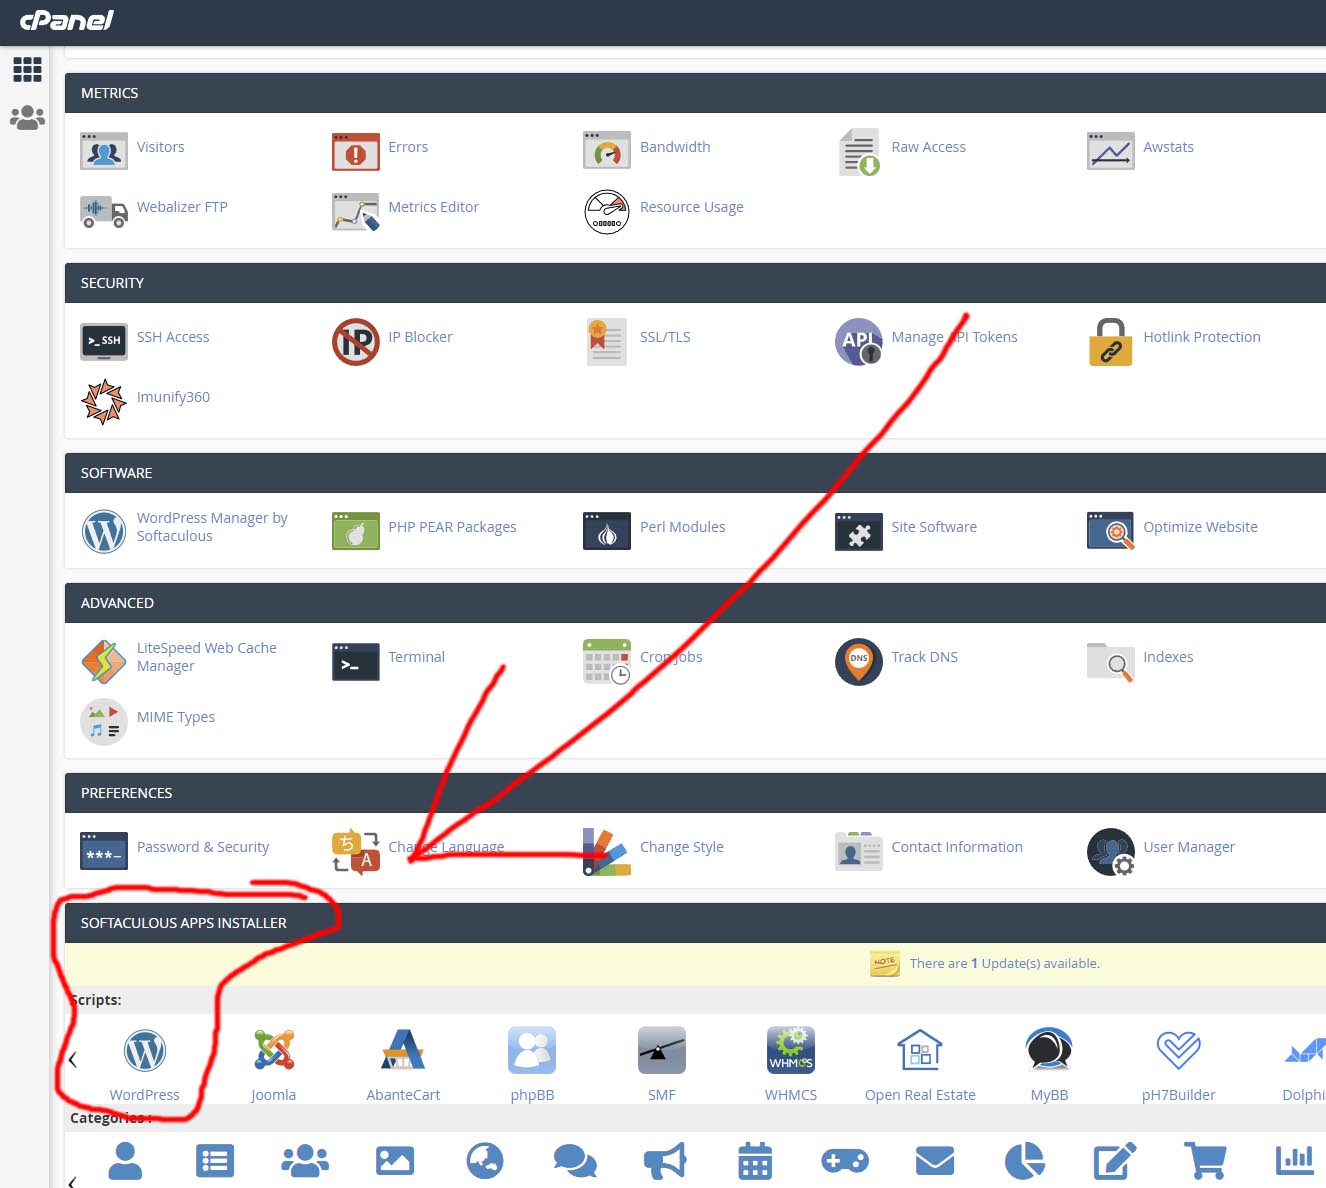
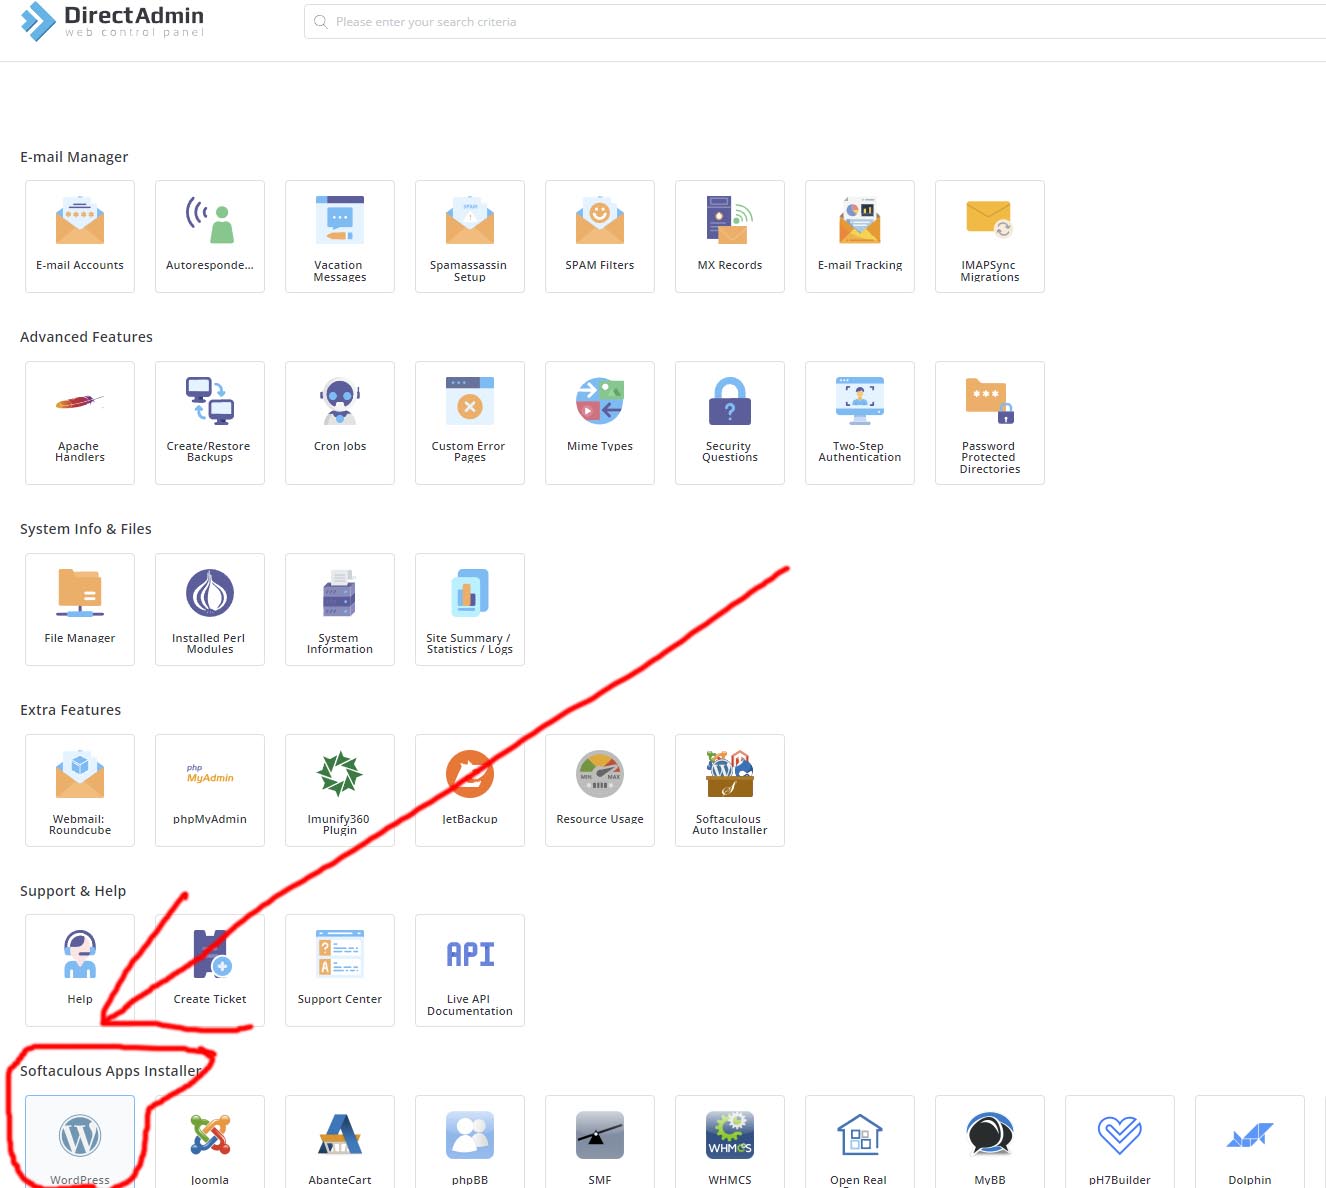
Log into the control panel of the account you will be creating this staging subdomain for and then click on Softaculous
For cPanel:
For DirectAdmin:
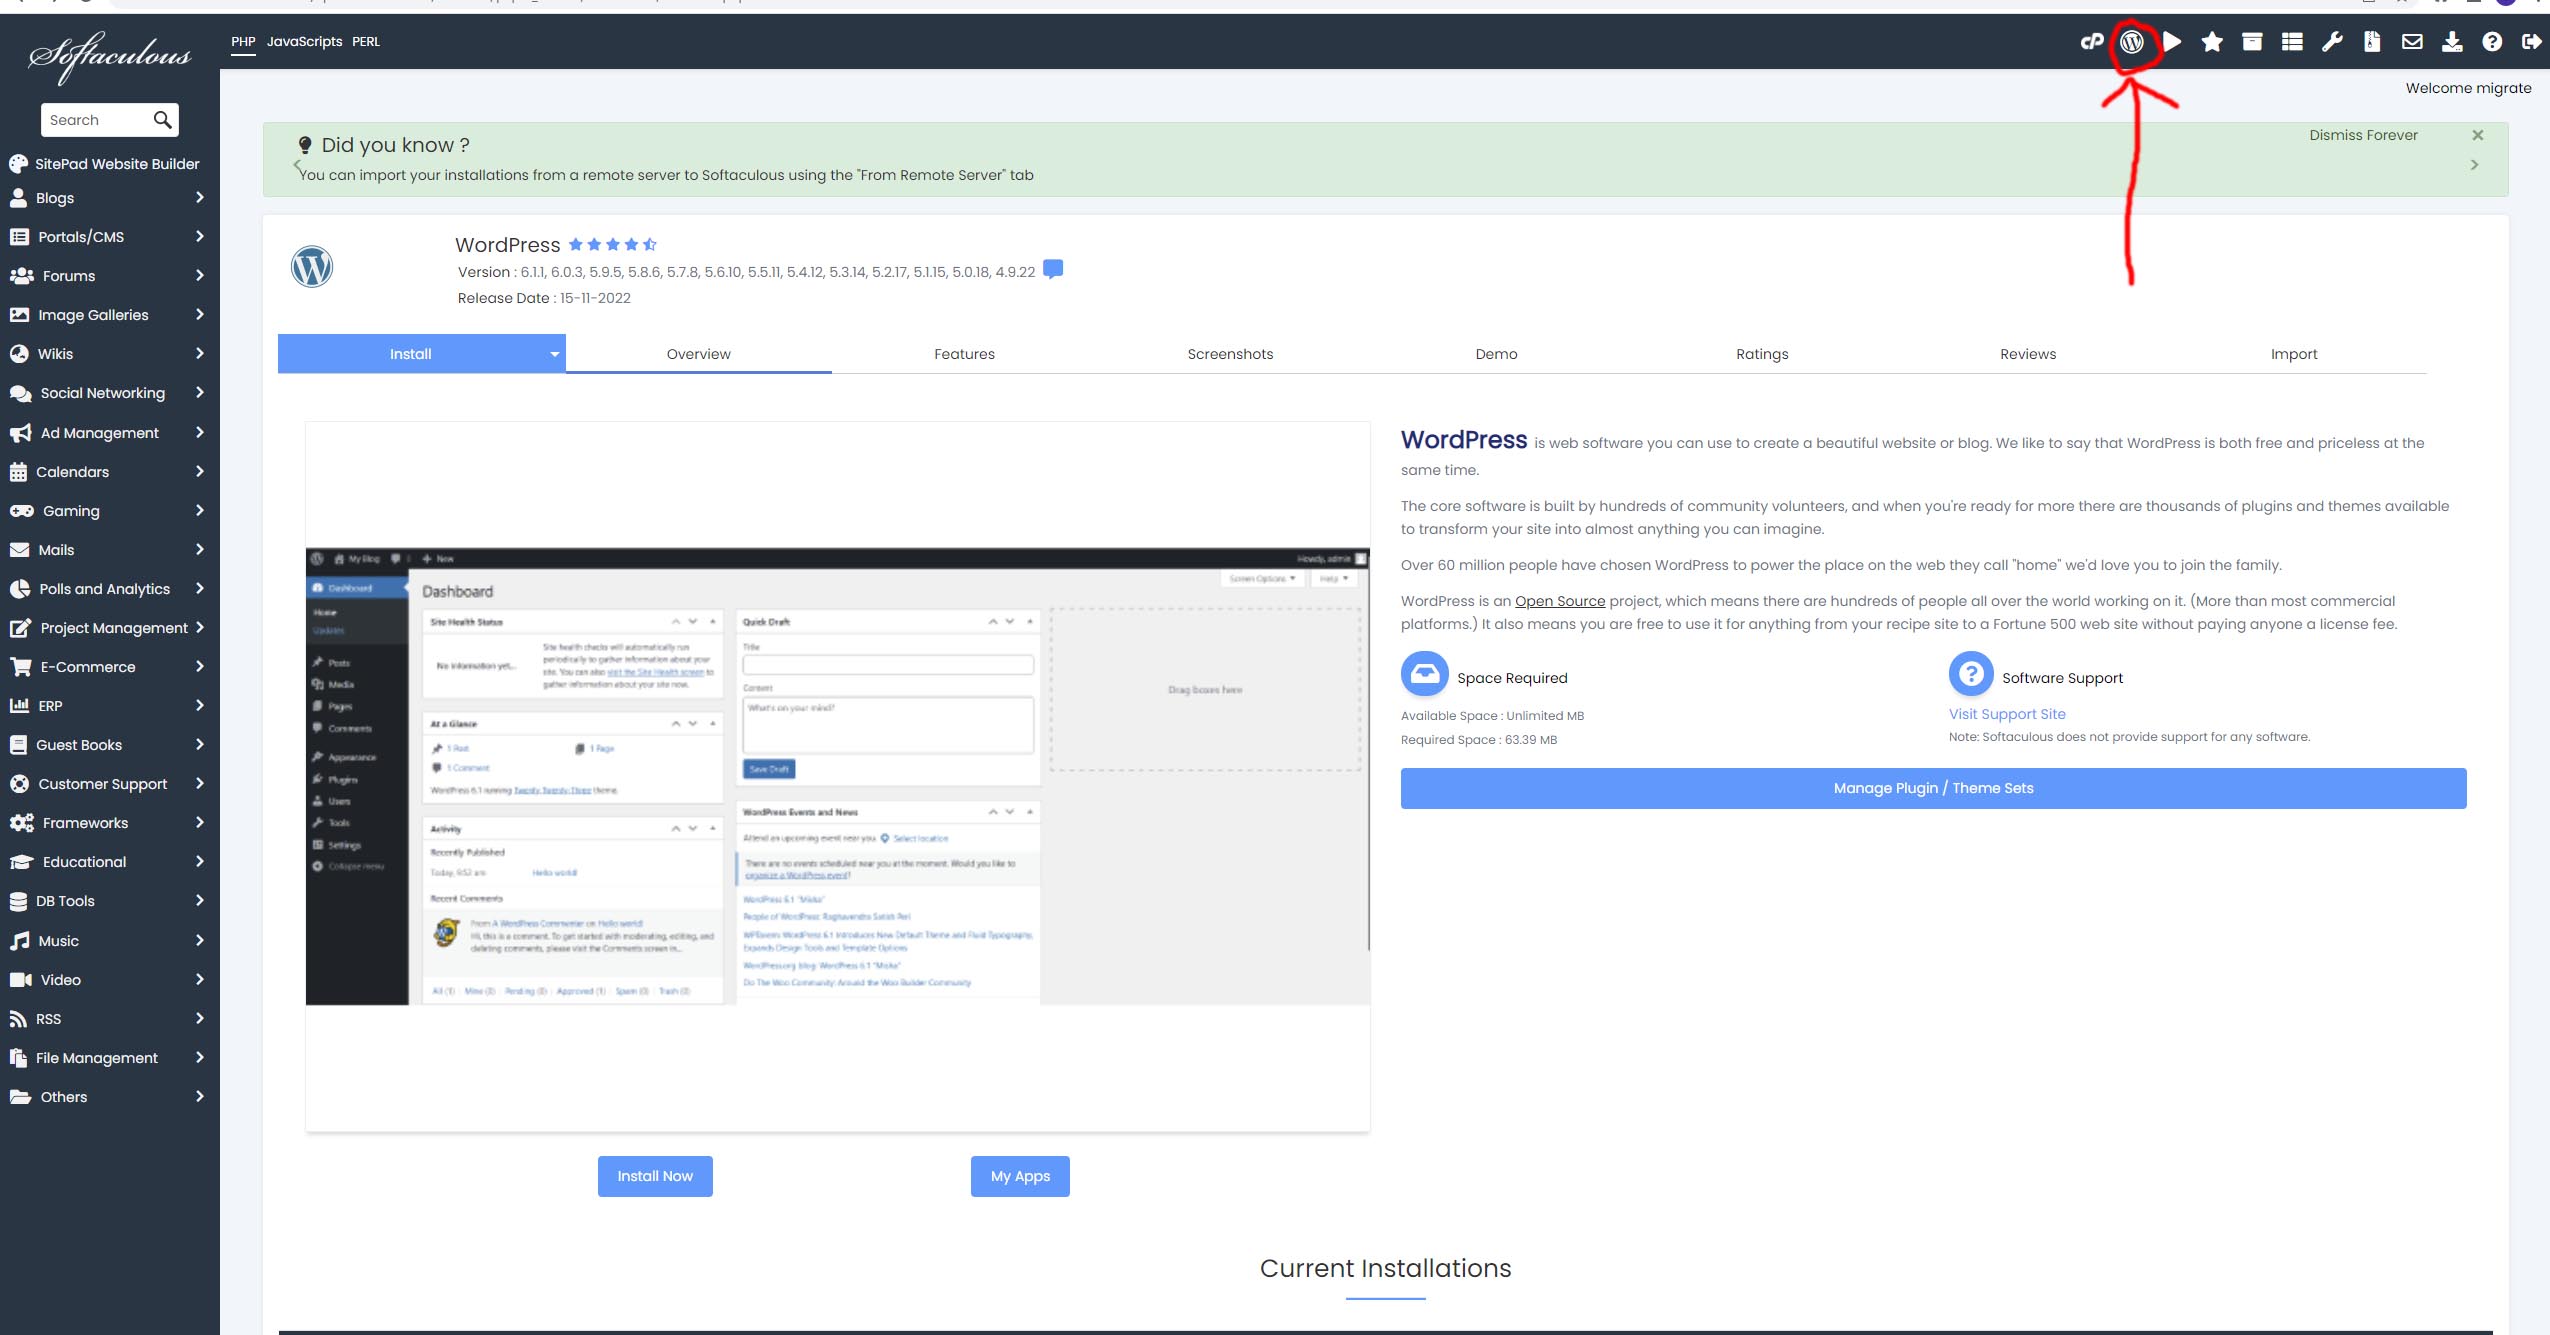
2. Head to the WordPress Manager
Now, click on the W icon in the top right hand corner of this page that says “WordPress Manager” when you hover over it
NOTE: If you are creating a staging area for a site that is pointed to this server, follow keep following this tutorial. If you are creating a new WordPress site so you can build your client a new website, please skip over to this tutorial now that shows you how to install WordPress “The Correct way!” http://blog.webhostpython.com/2019/11/22/how-to-install-wordpress-through-softaculous-the-correct-way/ . If you’re using DirectAdmin, simply skip the parts that mention cPanel
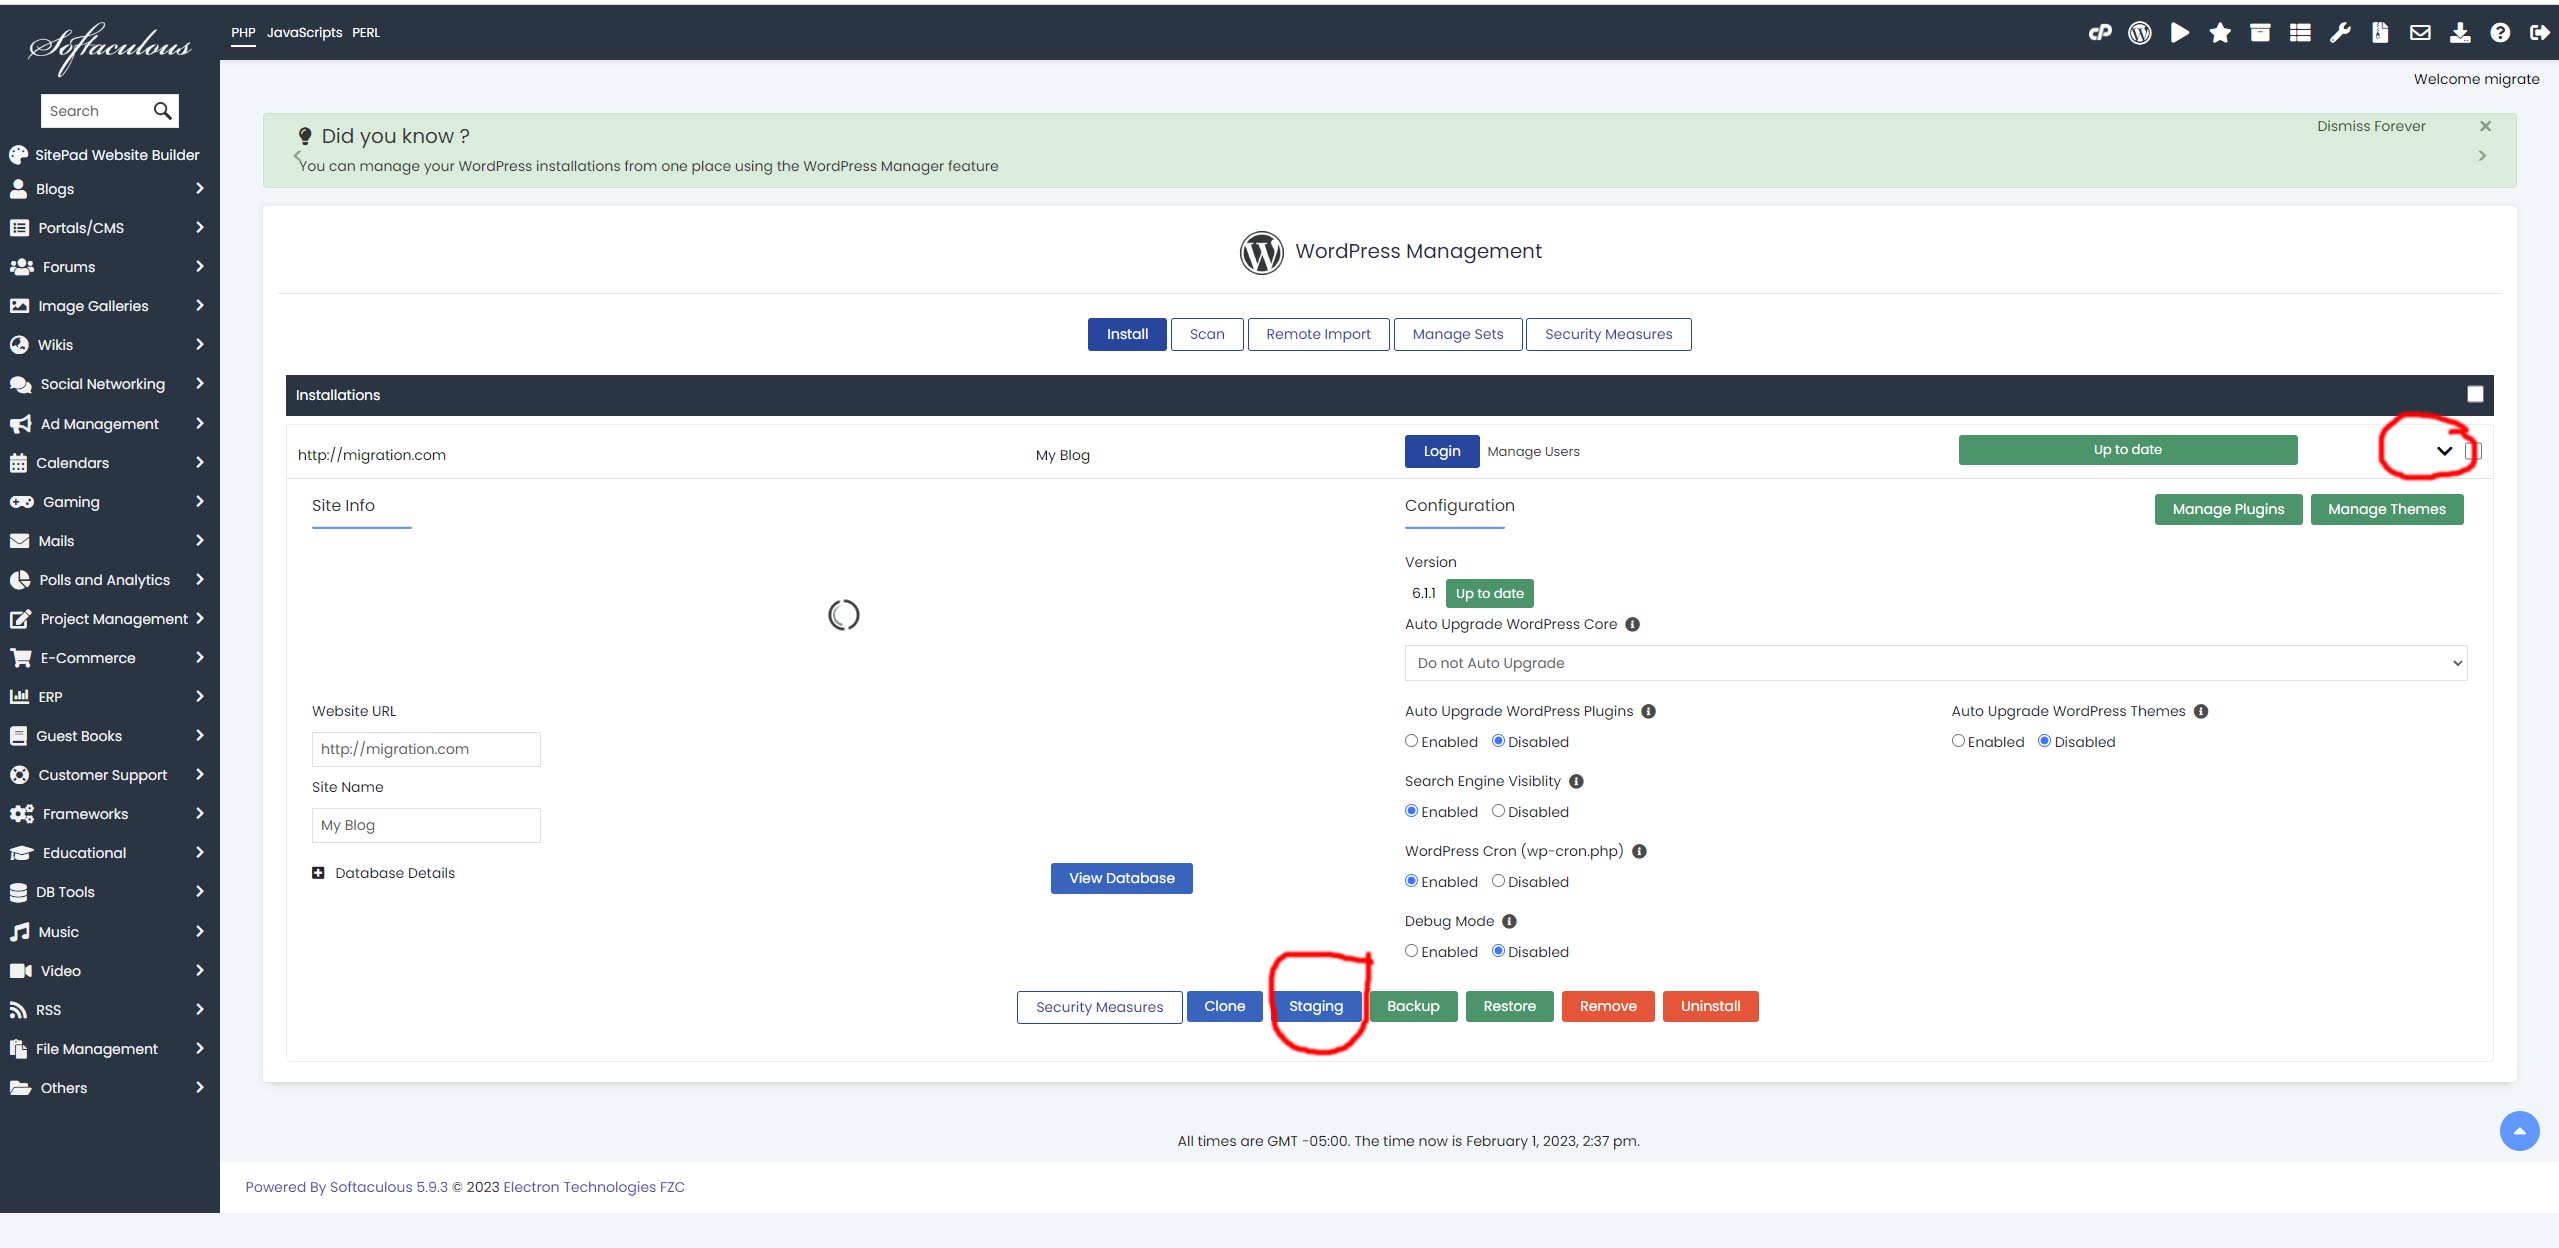
3: Accessing the staging area
Now you should see your main WordPress website here in a list. If not, click “Scan” and it will show the site listed here. Click the down arrow to the right, then click on Staging
4: Create the Staging area

Make sure you have https:// selected, for the directory type in “staging”, and then click on Create Staging. Once done it will show it was a success!
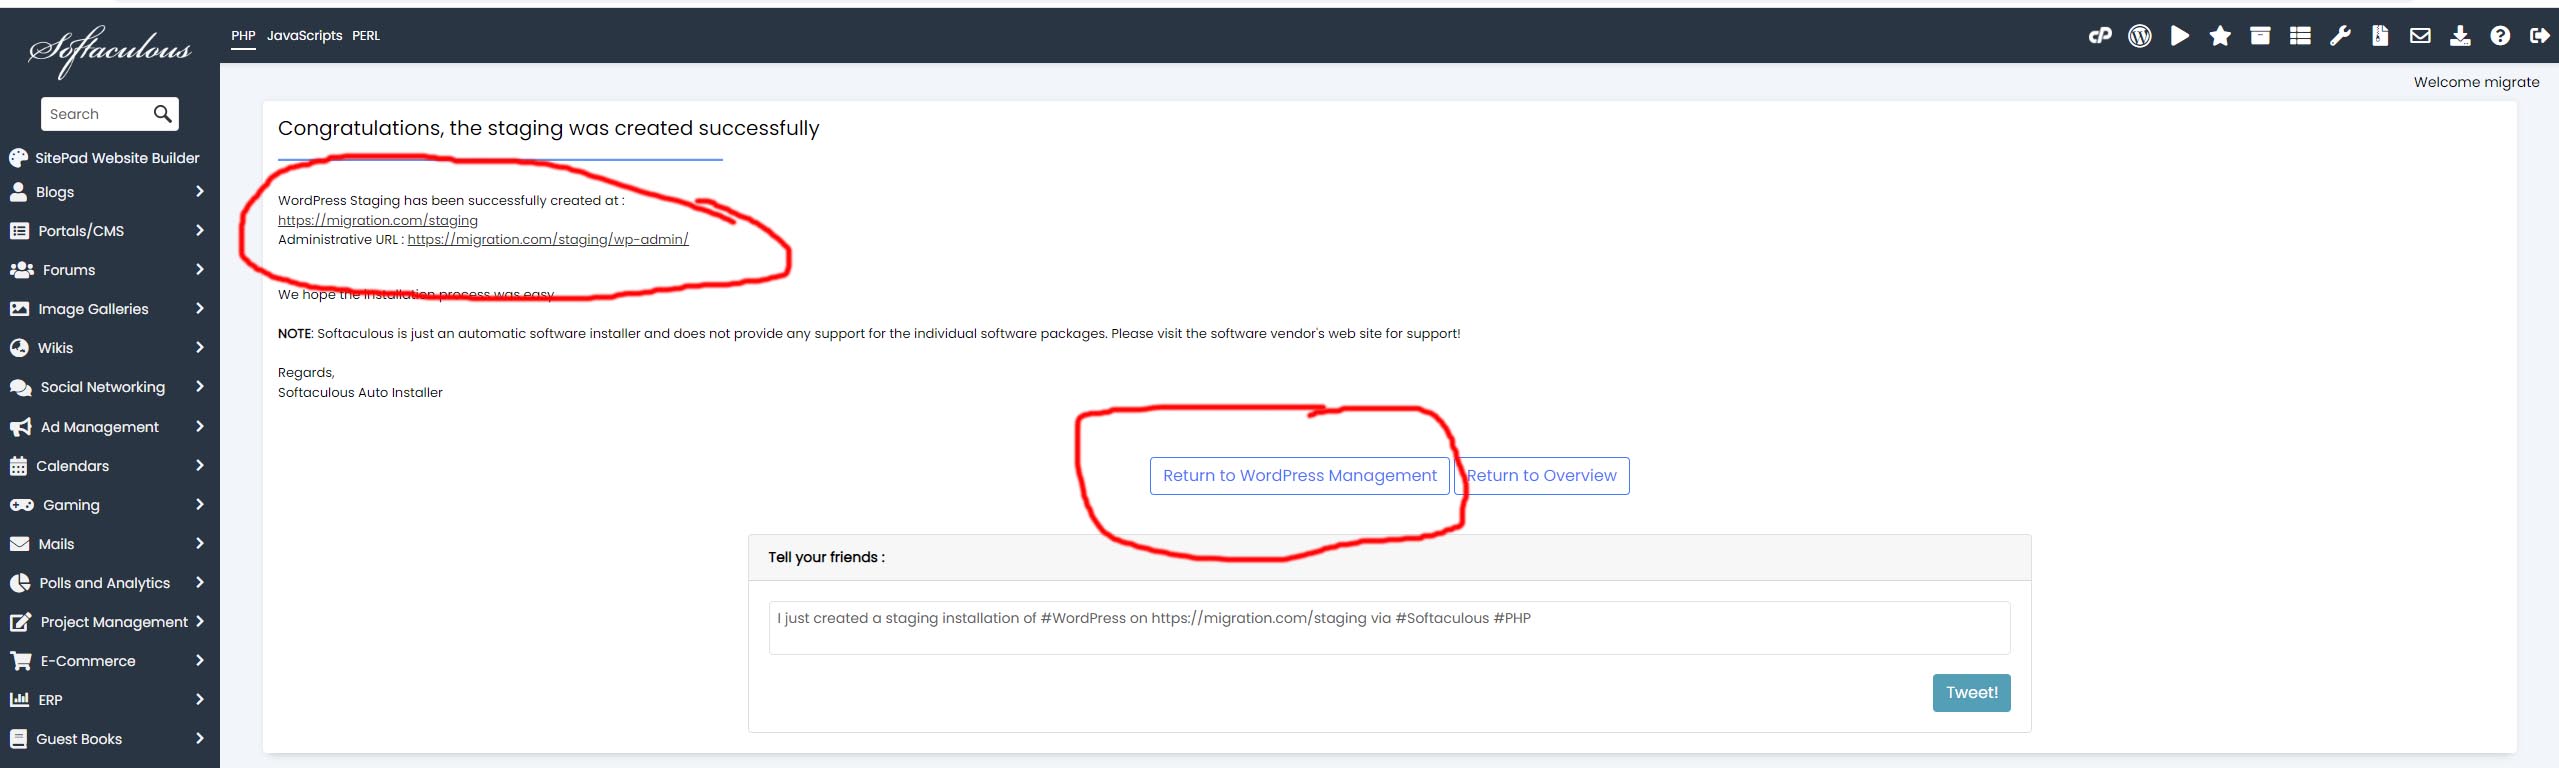
Now go back to the WordPress management screen by clicking on Return to WordPress Management
5: Now access the staging site or push your site live!
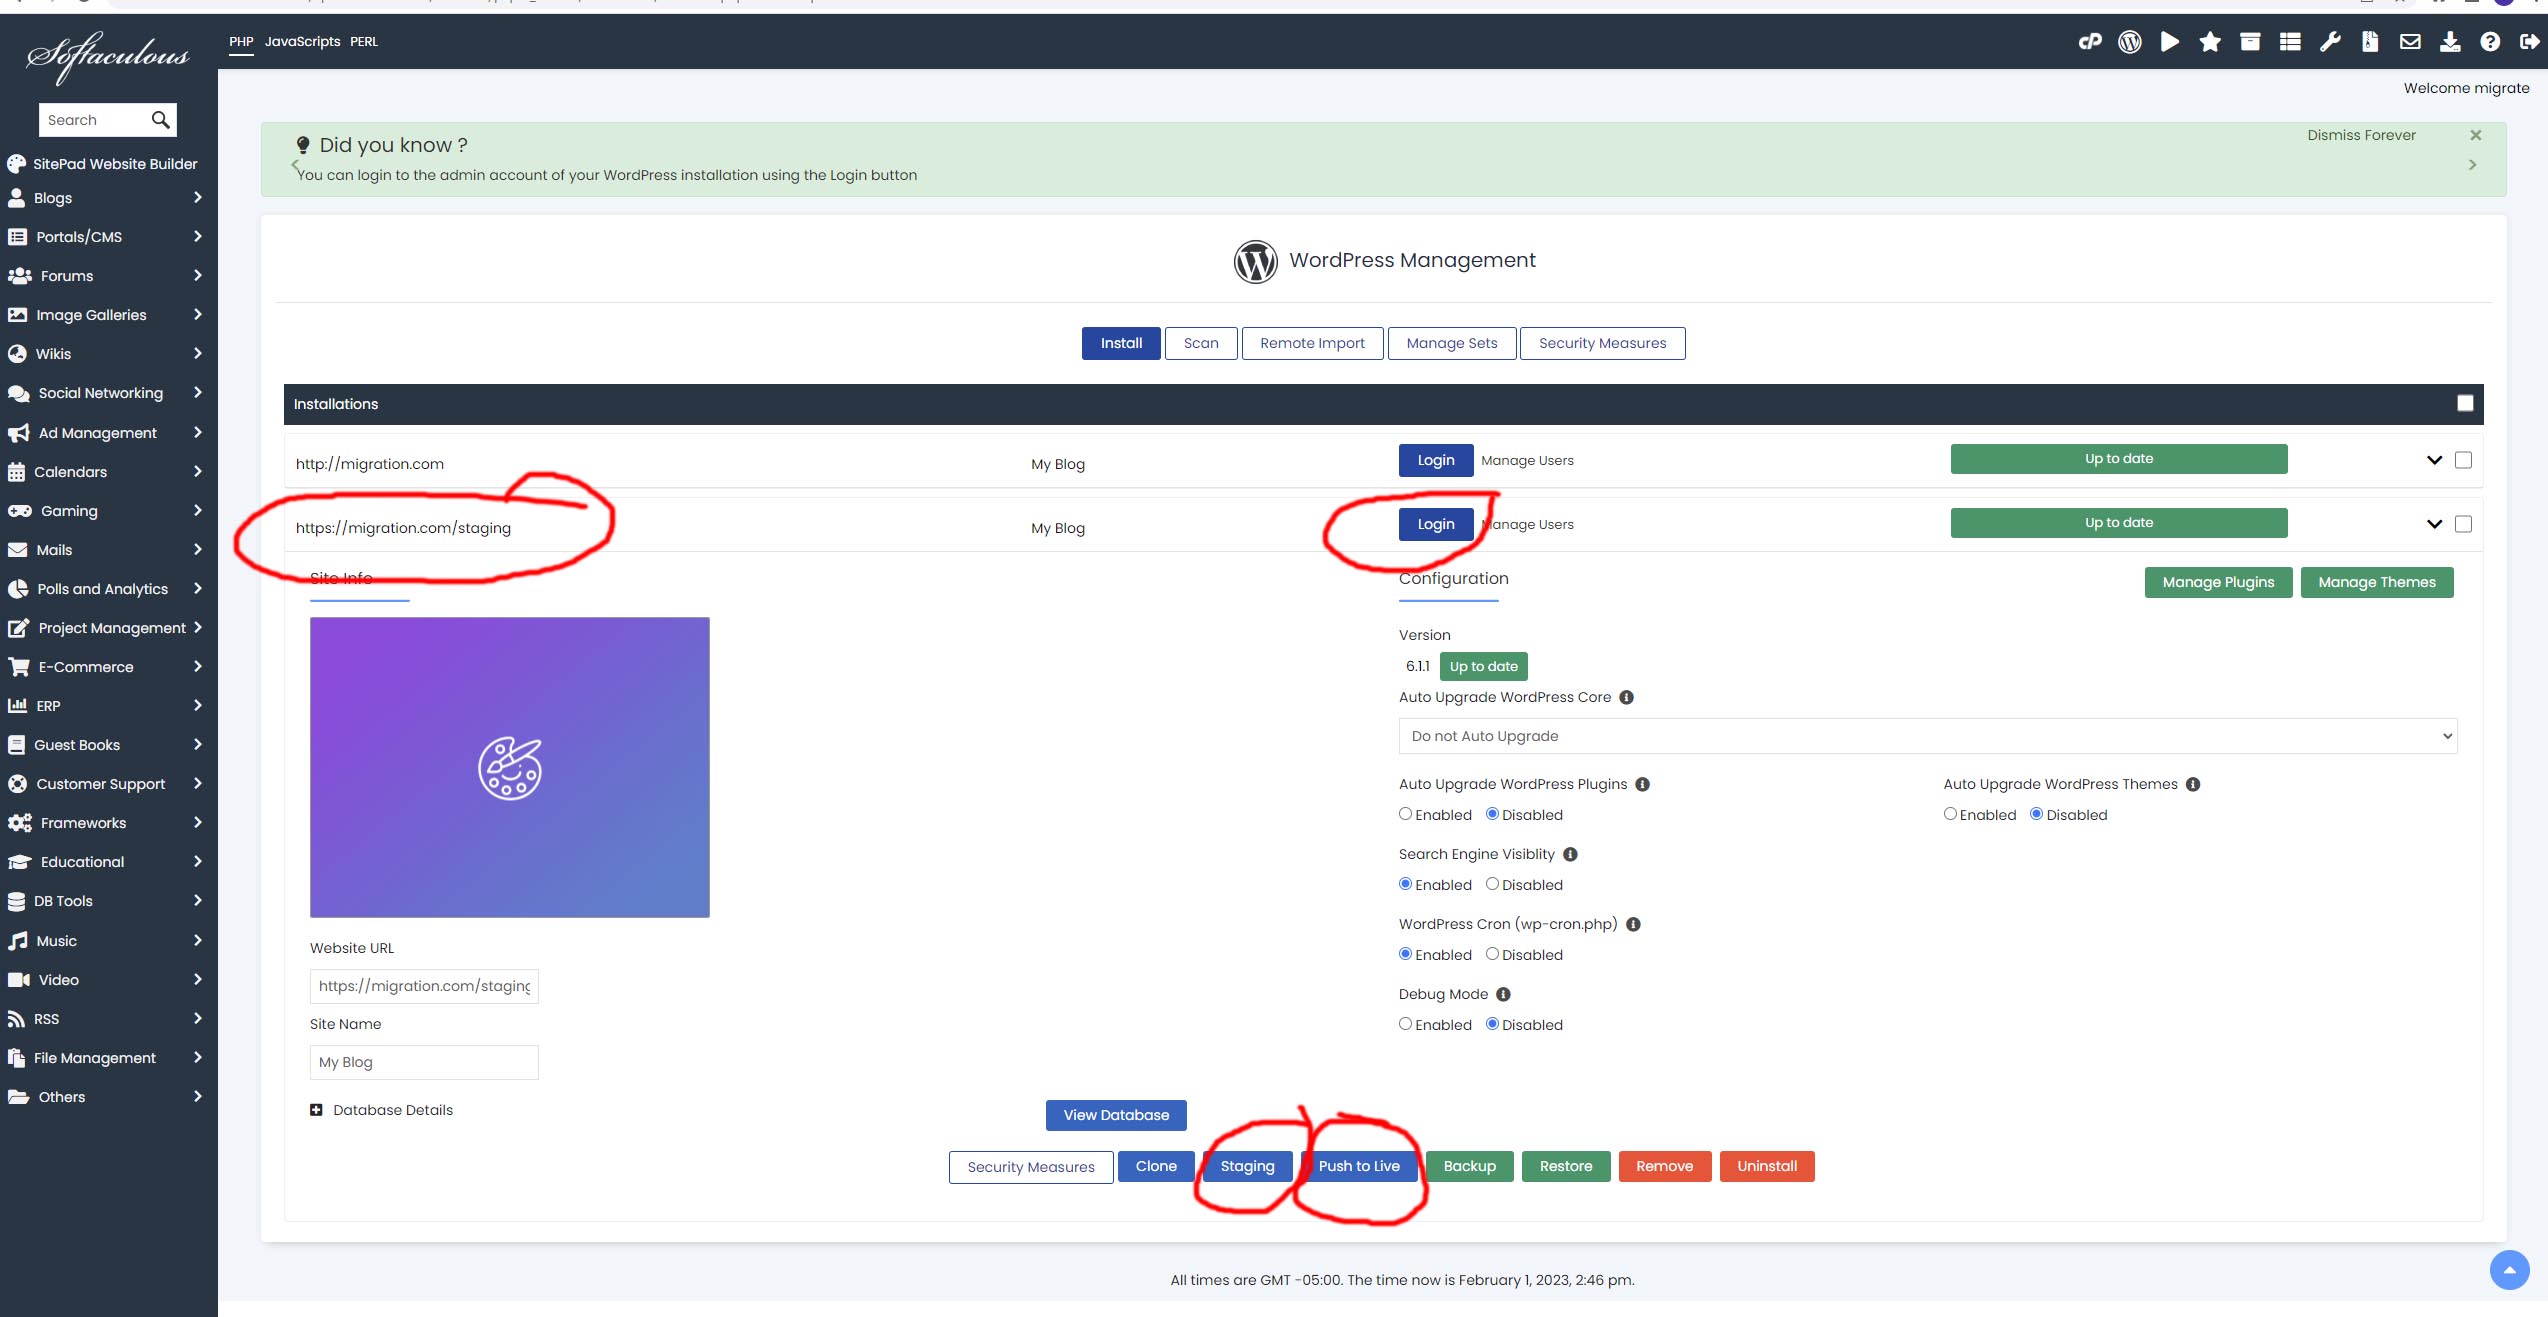
You can now see the staging site on your drop down list, you can log into it and work on the site. Once you are happy with your changes, you can click “Push to Live” and it will replace the original site with the staging one!
")


")


