

Congratulations on purchasing your new Website Builder plan. You have chosen to build your website using one of the easiest website builders on the internet! To access your new website builder, please do the following:
- Log into your Webhostpython account https://www.webhostpython.com/billing Once logged in, click on “cPanel”:

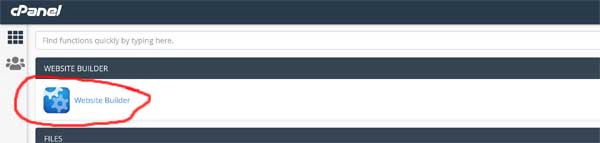
2. This will take you to the control panel. Simply click on the “Website Builder” Icon
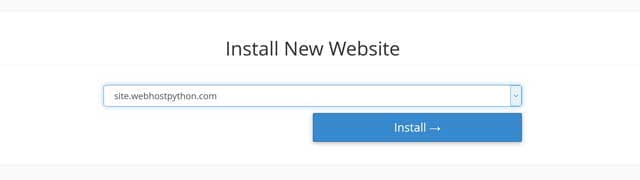
3. Now, click on “Install” to build the new website instantly.
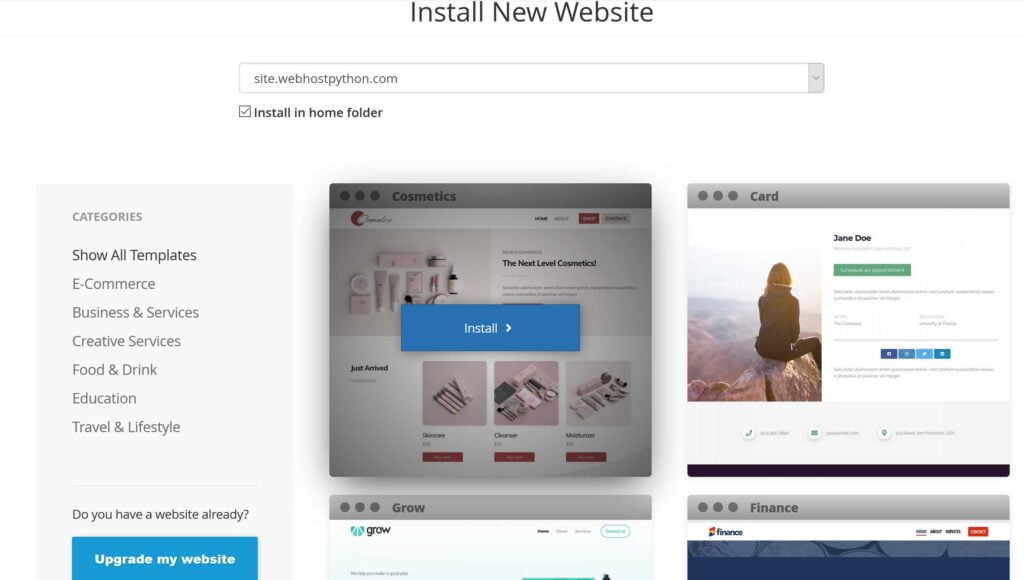
4. Now choose the template you want to build your new website around! When you find the one you want, hover your mouse over it and click on “Install”
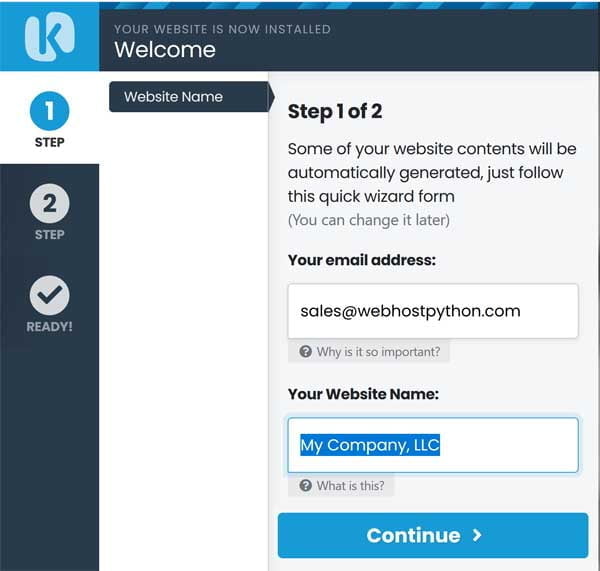
5. Now simply fill out the questionnaire so that the website maker knows what to populate your website with
6. That’s it! Your website is online and you can now begin making it yours!
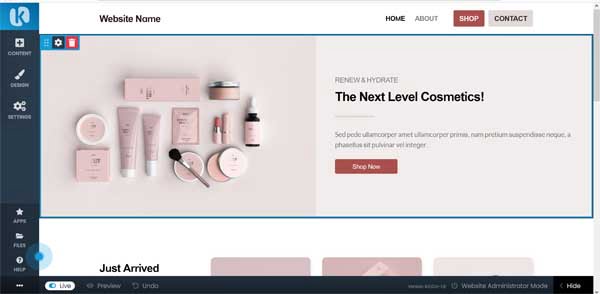
Your website is now ‘Live” and online. You can open a new tab in your browser and visit yourdomain to see how it looks!
We have many video tutorials created by the Kopage development team that you can find here https://www.youtube.com/playlist?list=PLce4hWTNhIDwewQj86k-sMG7WjUbjkAmo
However, here are some very important tips to know that will help you:
- Hover over any part of the website you want to change. When you hover over a section, it will give you editing options
- If you want to change things with the entire section itself, go to the “Block Settings” option that pops up after hovering over the section you want to modify. Here we call them “blocks”
- If you add a section to the website and you want to move the entire block ‘below’ or ‘above’ its current location, simply click and hold the 6 square dots that show up after hovering over the block. Then drag it up or down where you want it
- To create a logo, go to “Design” and then select “Create a Logo”. This will allow you to choose the logo of your choice and/or modify it using the free logo maker. You can then download that logo and use it on your website
Thank you and enjoy!

")

")


")